Maikng 3D Water Scapes
Step 1 : Create a new document, select a light shade of blue, saturated to 100% for you foreground color.Select white for your background color.Either use a cloud filter to create a cloud texture over the entire image, or fill with your foreground color and paint in the clouds with white using a large soft brush.Step 2: Select Image>Adjustments>curves.
Adjust the curves so the blue becomes darker.The curves option allows you to maintain the hue and saturation of the image while darkening the midtones.
Step 3: Select the bottom two thirds of the image. Copy to a new layer and darken -50 as below. Darkening the image will allow the highlights of the water to be better targeted by the Plastic Wrap filter.
select Filter>Artistic>Plastic Wrap and apply the settings below.
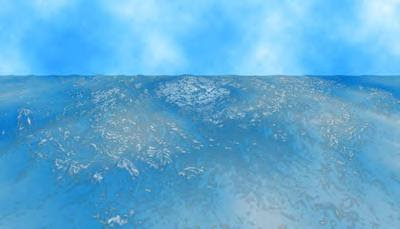
It will look something like this
Step 4: Zoom out enough to be able to see at least 100% of the image size on either side of the canvas.
Select Edit>Transform>Perspective and stretch the bottom anchors so that the bottom selection is 300% longer than the image, or 100% longer on either side.
It will look something like this
Step 5 : Using the liquify command or the smudge tool, smear some bumps and valleys up and down along the highlights of the water. Only apply the effect vertically, using a smaller brush as you ascend along the image. This will give more definition and form to the surface of the water. If applied properly, the highlights will appear as if they are catching the light at the tops of these bumps, rather than just being painted on a flat surface.
Step 6: Now, restore the brightness of the image, but keep it a bit darker than the sky.Stretch the bottom image about 30 percent horizontally. This will relax your new bumps and enhance the perspective of the water.
Step 7 : Select the portion of the sky that is visible above the water layer. Adjust the perspective so that the top anchors are 50% longer on either side of the image, or 100% longer than the original image.
It will look something like this
Step 8 : Using a soft brush, lighten a portion of the sky. This bright blotch should not be completely white or completely round.The object is to make it appear as if the light is breaking through and interacting with the clouds. Using a smaller, harder brush, whiten the center of the lightened area.
Step 9: Do the same on the surface of the water. Be sure to measure the distance of the lightened area of the sky, and create the water highlight the same distance below the horizon.
Add some seagulls and your done!


No comments:
Post a Comment